Terraform Basics


Table of contents


No headings in the article.
Terraform – Basics
Installing Locally and Running with Example
Step 1: For Terafform to work with AWS cloud we require AWS CLI Installed Locally and Terraform to be downloaded.
AWS CLI : awscli.amazonaws.com/AWSCLIV2.msi
Terraform: terraform.io/downloads
Step 2: Once the Zip file is downloaded Unzip and place the terraform.exe file in C drive C:/terraform/terraform.exe
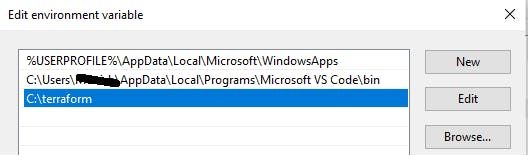
Step 3: To get the terraform.exe to work anywhere in local system we need to add the path in environment variables Environment variables:
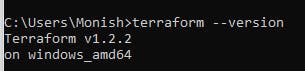
Step 4: Now check the version of terraform running in any of the folder path like below :
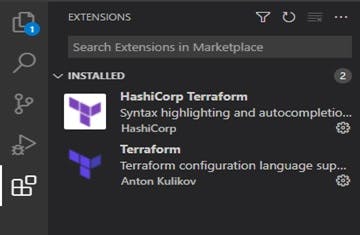
Step 5: Use VScode to work with terraform Install/Add terraform Hashi corp plugins into the IDE.
Step 6: Create a new Folder/Directory with anyname like terraform01 and create a new file hello.tf (here tf is a terraform extension) Run terraform init command.
Terraform init command used to initiate the Provider details i.e AWS, GCP, Azure etc
Terraform validate – Syntax validation Step 7: Now we need to add the Blocks like below: Terraform setting block mostly used in Prod environment to set the version.
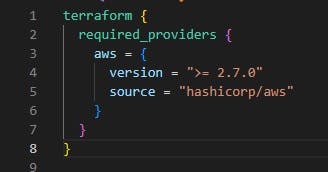
Note: whenever there is a change with the providers block we need to run the Terraform init command for the new changes to reflect.
Step 8: Now we need to add the provider block with User Profile
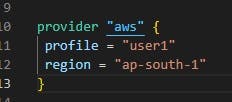
Step 9 : The user profile is configured like below
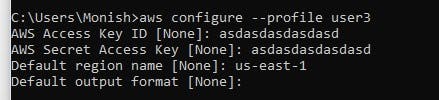
Access Key ID and Secret Access ID are provided by IAM user NOTE : Create a IAM user in AWS console and provide a programmatic access you will get the credentials block in which the above id’s are present. In local computer we can find an .aws folder in which the credentials are saved.

Step 10: Once the provider block is initialized we can add resource blocks to same .tf file or we can create a new .tf files for each new resource. NOTE: .tf files are combined and executed by terraform, No code is reuired to include the files.
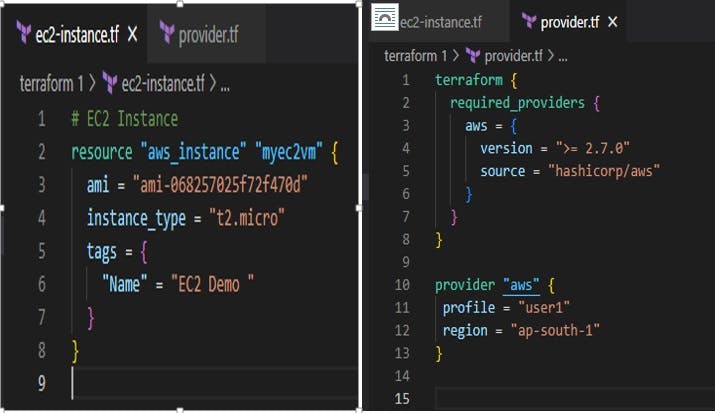
Now run the terraform plan command and check the terminal output
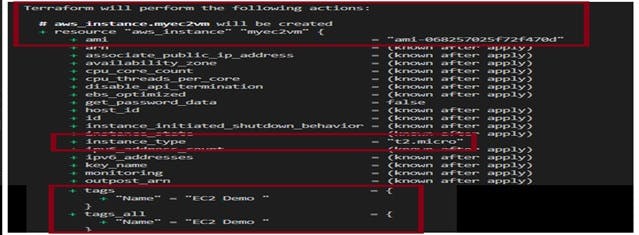
Step 11: Now run the terraform apply command which will create a whole architecture that an EC2 instance in Mumbai region with t2.micro instance type and named as “EC2 Demo”. New file named as terraform.tfstate is created which will have all the details of newly created architecture
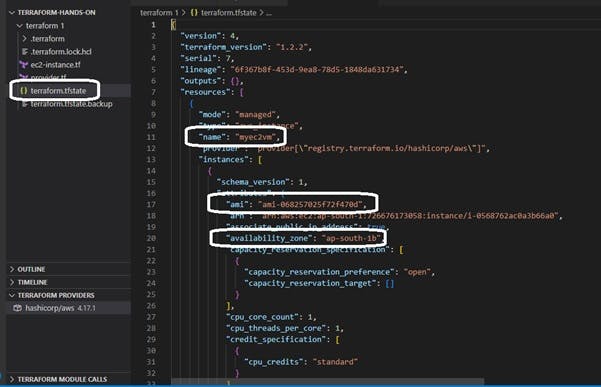
NOTE: we get all the details of the EC2 instance that we have created here. Step 12: Now check into the AWS Console the New EC2 Demo Instance created.
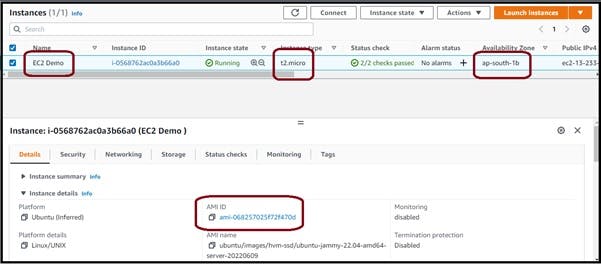
Step 13: Simillarly we can add our Own VPC, Subnets all the AWS services.