Easy way to start with AWS EKS Cluster Creation using EKSCTL TOOL :
eksctl is a simple CLI tool for creating and managing clusters on EKS - Amazon's managed Kubernetes service for EC2. It is written in Go, uses CloudFormation, was created by Create a basic cluster in minutes with just one command
Type 1 : Default
eksctl create cluster
NOTE: Here eksctl will create a cluster using default values of the AWS Account.
Type 2 : Using yaml file creation
And we can also use a createcluster.yaml file mean we can create a cluster using a yaml file and can run to create a whole cluster.
eksctl create cluster -f createcluster.yaml --profile EKS_USER
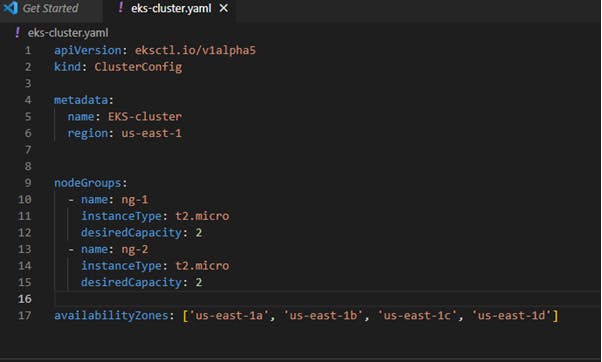
Below is the yaml file details :
apiVersion: eksctl.io/v1alpha5
kind: ClusterConfig
metadata:
  name: basic-cluster
  region: us-east-1
nodeGroups:
  - name: ng-1
    instanceType: t2.micro
    desiredCapacity: 2
  - name: ng-2
    instanceType: t2.micro
    desiredCapacity: 2
STEPS TO FOLLOW………..
Step 1: Download eksctl from the link given below https://github.com/weaveworks/eksctl/releases/download/v0.103.0/eksctl_Windows_amd64.zip
Once downloaded extract it you will get the eksctl.exe file Step 2: Now place this eksctl.exe file in C:/programfiles/eksctl folder and add this URL to Environment variables so you can access this file anywhere in your local system. Step 3 : Configure you AWS Credentials by running below commands
aws configure --profile EKS_USER
Now add the Access-key and Secret-key that you will get when you will create a new User in AWS IAM.
Step 4: Now create a EKS Cluster using CLI. Using Default Values. To check the successful installation of eksctl :
eksctl version


eksctl  create cluster --profile EKS_USER --name mycluster


eksctl delete cluster --profile EKS_USER --name mycluster
Step 5 : Now we can create a Cluster using YAML file create a yaml file like below i.e Type 2:

eksctl create cluster -f eks-cluster.yaml --profile EKS_USER
NOTE: This will create a Cloudformation stack and execute it. You can check the cloudformation events and resources created by it in console Once you get a success message in terminal like below you can check in AWS Console of the resources created.

