

Step 1: Create 2 EC2 instances
Step 2: Install Mysql on both Instances. Check the installation by running below commands
- mysql --version
- sudo service mysql status
- sudo service mysql start
- sudo service mysql stop
- sudo apt-get update
- sudo apt-get install mysql-server mysql-client
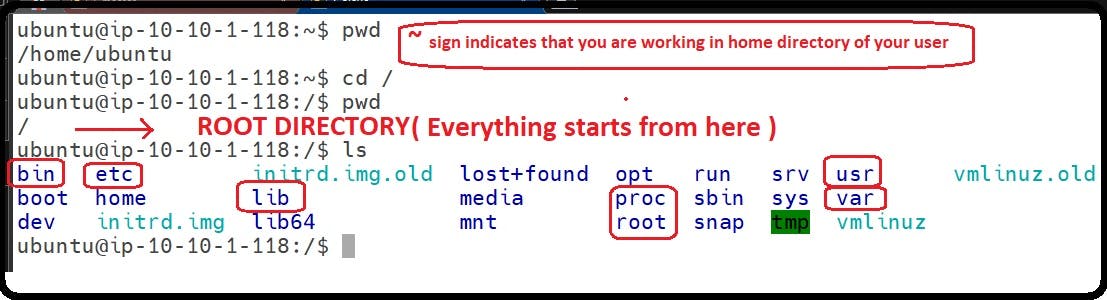
Step3 : When we are logged in to the servers we are directly working with /home/Ubuntu directory that ( ~ ) , So for the bin or etc folders of the applications we need to move to the root directory that “/” like below :
 Step 4 : we need to bind our mysql with our master machine private address and set server- id to 1.
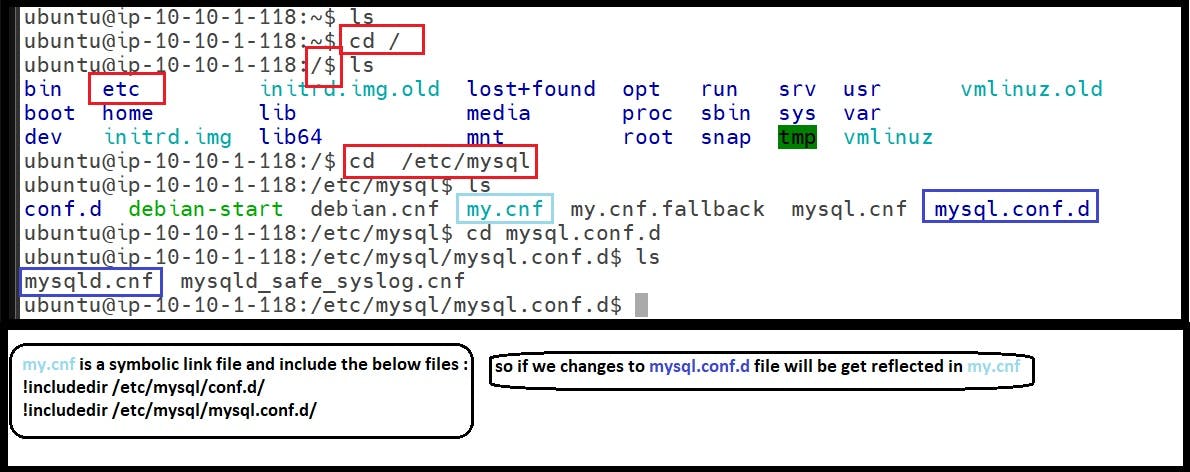
For this we need to change database configuration file which are placed in below path :
/etc/mysql/mysql.d.conf mysqld.cnf or we can work with the symbolic link or can say shortcut of the file which is my.cnf
Step 4 : we need to bind our mysql with our master machine private address and set server- id to 1.
For this we need to change database configuration file which are placed in below path :
/etc/mysql/mysql.d.conf mysqld.cnf or we can work with the symbolic link or can say shortcut of the file which is my.cnf
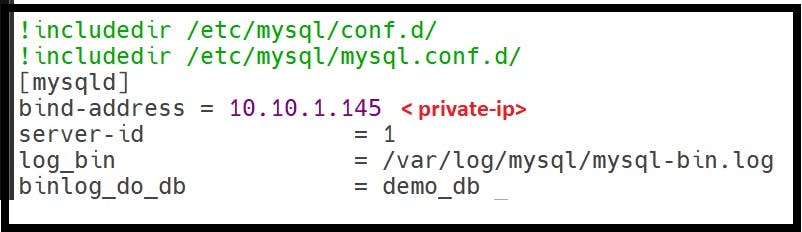
Step 5: Below are the details that will be added in my.cnf file or add/uncomment same in /etc/mysql/mysql.conf.d/mysqld.conf
- [mysqld]
- Bind-address =
- Server-id : 1
- log_bin = /var/log/mysql/mysql-bin.log (bin-log events that changes to master server db is recorded here)
- binlog_do_db = demo_db (Need to create this DB)
restart mysql server after adding above details.
 Step 6 : Login to database using root as a user
sudo mysql –u root (no password required)
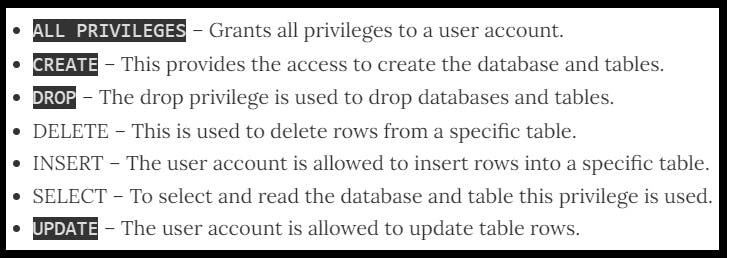
SYNTAX : GRANT REPLICATION SLAVE ON . TO 'slave'@'%' IDENTIFIED BY 'slave'; GRANT REPLICATION SLAVE ON . TO 'username'@'%' IDENTIFIED BY 'password';
NOTE : Here new user with "." all priviliges and ‘% ‘ sign means can be connected from any host is created. NOTE : if we need to restrict the connection from particular host we can add host-id with create user command:
CREATE USER 'new_user'@'10.10.1.118' IDENTIFIED BY 'new_user_pssword';
SELECT user,authentication_string,plugin,host FROM mysql.user;
SELECT CURRENT_USER();
PRIVILIGES ARE :
 Step 7: Perform a flush-privileges operation so server will reload grant tables
FLUSH PRIVILEGES;
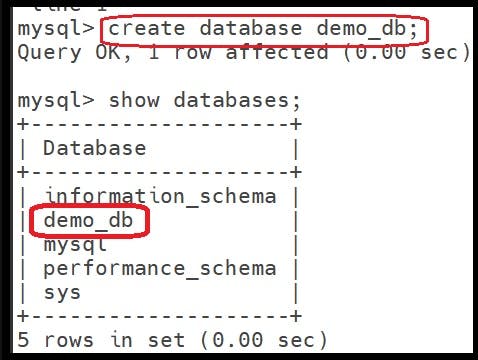
show databases;
create database demo_db;
use demo_db;
Step 8 : Lock the database to prevent any new changes and setup a slave now
FLUSH TABLES WITH READ LOCK;
Step 9 : Now we need the position and log file details which we get it from the below command : SHOW MASTER STATUS;

Position 849 : this is the position from which database will start replicating so now to stop new changes we will lock the database and will work with a new tab window.
so go to new tab and create a mysqldumb file that will be get exported to slave host run below commands for same : here demo_db.sql will get created in home directory sudo mysqldump -u root -p --opt demo_db > demo_db.sql (export command)
NOTE : The mysqldump client utility performs logical backups, producing a set of SQL statements that can be executed to reproduce the original database object definitions and table data. It dumps one or more MySQL databases for backup or transfer to another SQL server. The mysqldump command can also generate output in CSV, other delimited text, or XML format.
Step 10 : Once the demo_db.sql means a dumb file is created let us copy to our slave machine, so for copying file we will be using secure copy command and passing the private key that we have assigned at the time of ec2 instance creation --> Upload the key.pem(Private key of Slave {ec2-2}) file to our Master(ec2-1) machine and run below command
scp - i <path>/key.pem <path>/demo_db.sql ubuntu@<slave-private-ip> :demo_db.sql
Our command : sudo scp -i key.pem demo_db.sql ubuntu@10.10.1.118:demo_db.sql
Here demo_db.sql will get created on Slave machine
Step 11 : Now return to the older tab of Master server on which SQL shell is locked step no. 8 Unlock tables;
Step 12: Now connect to Slave machine and Connect to mysql db on it like below: And create a database demo_db similar like Master machine.
Step 13 : import a mysqldumb that we have copied from master i.e demo_db.sql mysqld –u root –p demo_db < demo_db.sql (import command)
Step 14: Now configure the slave configuration that we have done as a MASTER machine /etc/mysql sudo nano my.cnf Add below commands for making a machine as slave i.e server-id = 2
- server-id = 2 (this will make a server as a Slave machine)
- relay-log = /var/log/mysql/mysql-relay-bin.log (add this line this will copy a data from bin-log file events, This file is not by-default added we need to add it explicitly)
- log_bin = /var/log/mysql/mysql-bin.log (the data changed on master server is copied here using bin-log events )
- binlog_do_db = demo_db (the database name of slave 2 where data needs to copy from relay_log files)
Step 15: Now we can start our Replication Step login to mysql shell in slave machine and provide the details like credentials for connecting to master and bin_log file details like position and mysql-bin.000393 file to be taken into consideration COMMAND used :
CHANGE MASTER TO MASTER_HOST='10.10.1.145', (master-private-ip)
MASTER_USER='slave', MASTER_PASSWORD='slave', (credentials of user created on step 6)
MASTER_LOG_FILE='mysql-bin.000393', MASTER_LOG_POS=  849; (details from step 9)
This command does the following:
It designates the current server as the slave of our master server.
It provides the server the correct login credentials.
It lets the slave server know where to start replicating from; the master log file and log position come from the numbers we wrote down

Step 16. : Start the slave
start slave;
show slave status\G
Step 17: insert database into the demo_db create a new table and insert values into it the values will get added to the slave machine
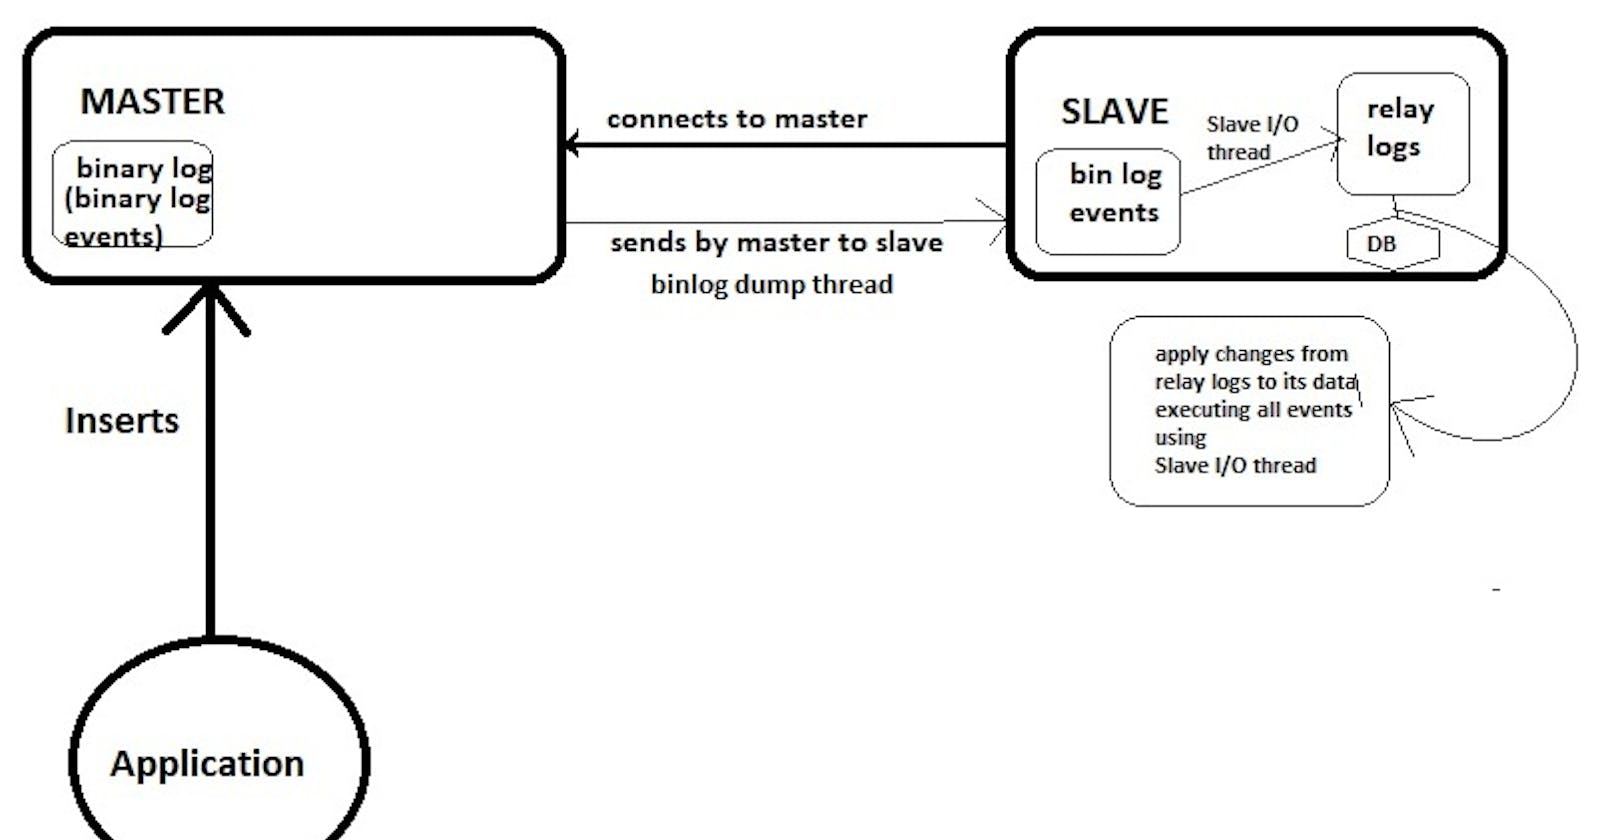
Conclusion:
1) Whenever there is a new data entered into a database of master server via tables etc changes are added to binary logs and that binary logs are added to binary_dumb thread which provides data to slave when slave got connected

2) Other most important thing is the credentials that are required to get connected from slave to master so we create a user in master database have all privileges to copy and add data to slave database.
3) Once the credentials are added successfully we can check the mysql-bin last dumb file and position which we will need to get connected while we are changing the master –host of the slave machine